Author Topic: Windshield channel replacement pics  (Read 11542 times)

0 Members and 1 Guest are viewing this topic.

Offline WkillGS

  • Administrator
  • Crazy about Buick!
  • *****
  • Posts: 1996
Windshield channel replacement pics
« on: February 21, 2009, 11:03:39 PM »
By request!
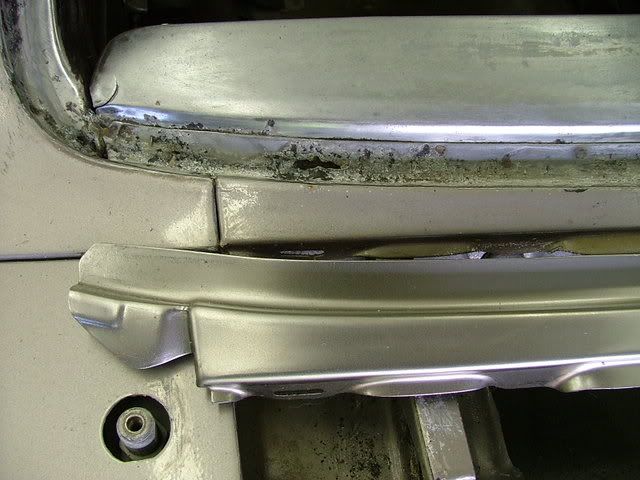
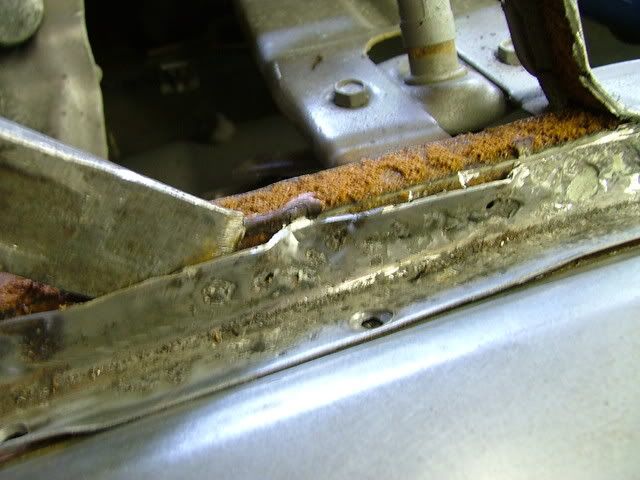
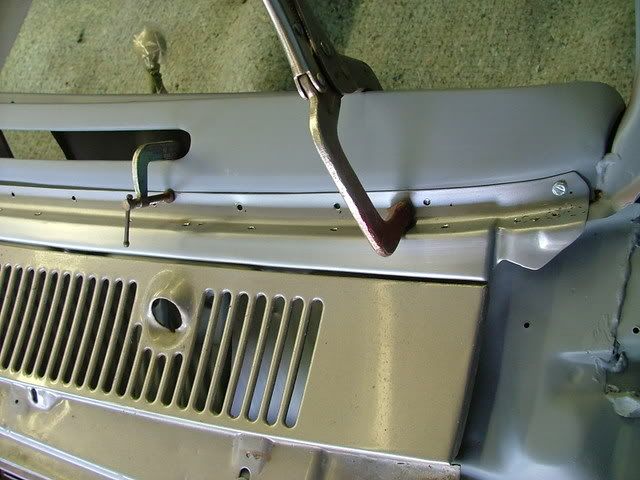
The front windshield channel on my 66 GS was pretty bad. Previous owner had just applied duct tape and Bondo over the holes to 'fix' it! ???
Repo pieces are avail for Chevelles. There is a channel piece, and a dash piece. The defrost ducts are different between The Chevelle and my 66 GS, so the dash repair piece was nearly useless.  But the channel piece is the same. About $65.
Note that the part extends below the front fenders.


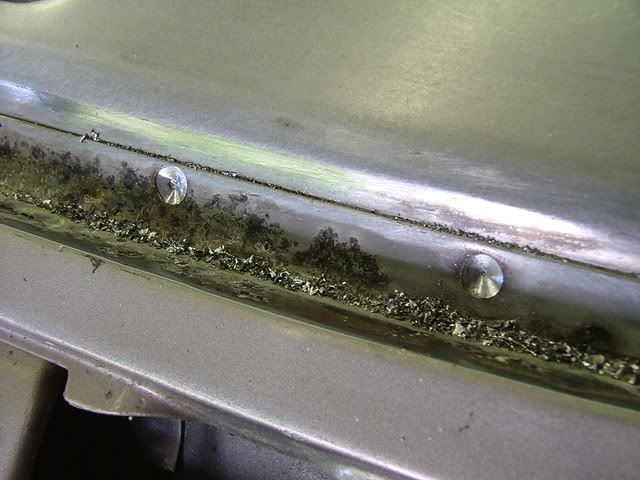
Removal begins by wire-wheeling the old piece to locate the spot welds. Center-punch the welds, then drill part-way thu to weaken the weld. A spot-weld-cutter also works well.


Then use a thin chisel to separate the pieces:


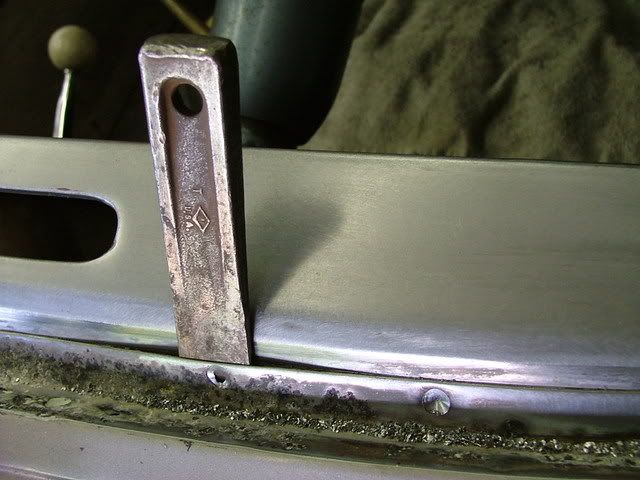
For the hood side of the channel, I decided to cut a strip off with a cut-off wheel so I could access the drilled spot welds with the chisel:


Separating the partially-drilled welds:


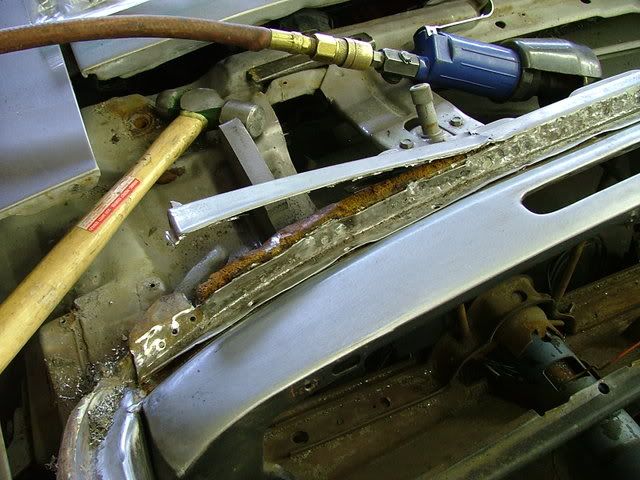
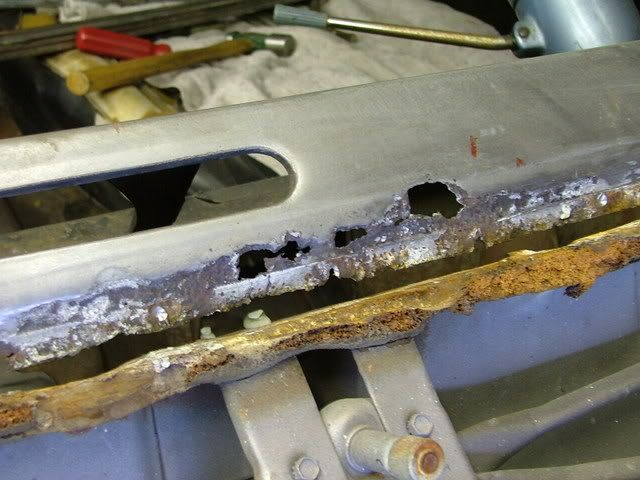
This is the worst of the dash panel. It was cut out, and a repair piece was installed:


First tack-welded, then fully-welded and ground smooth:


I eventually decided to do a full frame-off resto on the car! Entire interior was sand blasted. Here is the area without the windshield channel:


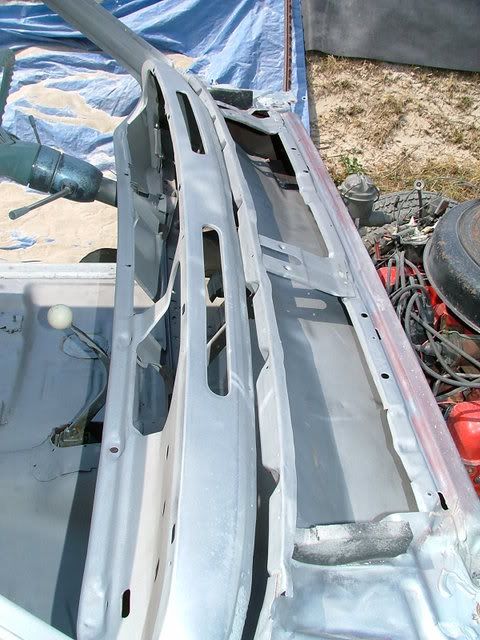
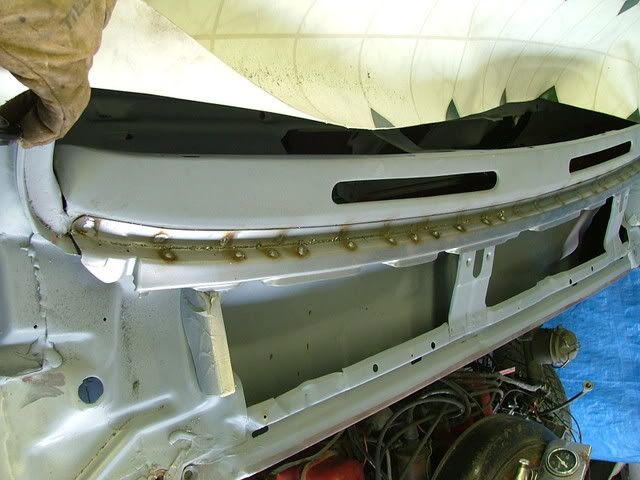
Cowl vent was reinstalled to align the replacement channel:


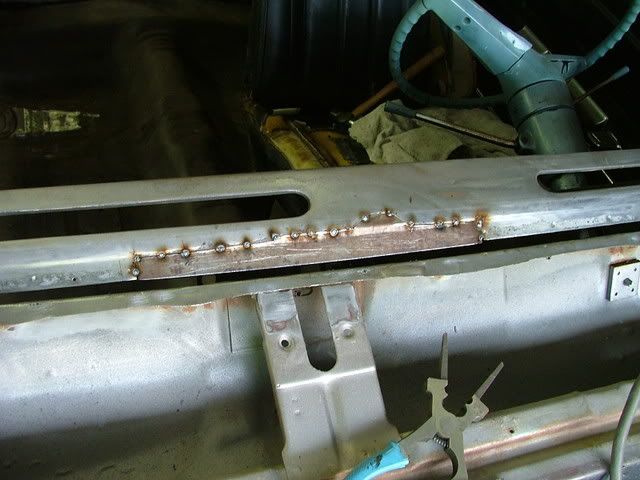
Note the holes drilled in the replacement channel. This is where the new welds will be. A mig-welder is used to weld thru the holes, joining the two pieces. This technique is called 'button-hole-welding'. It's a great way to reproduce the factory spot welds.


All welded in!


After this, the posts for the molding clips will be spot-welded in using a auto-body stud welder. It will reproduce the factory molding posts EXACTLY. ;D

This isn't an incredibly difficult job. But it does require removal of the front fenders.
If you can just patch the existing channel, that may be a better option....

PLEASE realize there is a fire hazard from the grinding and welding involved...the firewall insulation is very flammable. It may smolder for hours before it bursts into flames!

Have fun, but be safe! ;D


Walt K
Eastern Pa

66 GS Astro Blue/blue 425 auto
66 GS Silver Mist/black 401 4 spd
66 GS Flame Red/black 401 5 spd
66 GS Saddle Mist/black 401 L76 auto
66 Special Flame Red/black 300 5 spd
65 GS vert Verde Green/ Saddle buckets 401 4 spd
79 Turbo Regal

Offline Mark Ascher

  • Administrator
  • Crazy about Buick!
  • *****
  • Posts: 1615
Re: Windshield channel replacement pics
« Reply #1 on: February 22, 2009, 10:28:33 AM »
Walt,

Great information. Thanks!

Mark
65 GS HT 4 Speed - BCA Senior 2015; AACA Senior Grand National 2021
66 Impala 396/TH400/12 Bolt "Project Rodent Remediation" - Almost Done
69 Bel Air 2 Door Sedan "Project Junior Stock" - In Process
19 Chev Silverado Pickem Up (daily driver)

Offline Mister T

  • Crazy about Buick!
  • *****
  • Posts: 494
Re: Windshield channel replacement pics
« Reply #2 on: April 02, 2009, 05:57:40 PM »
Thanks for the step by step illustration Walt. Do you know if this would be the same piece for a 65 GS? I cannot remember for the life of me what windshield  differences there are between 65's and 66's. Whenever mine gets into resto, it will need this repair as well.
Tom B

Currently bereft of Buicks.

Offline Joe65SkylarkGS

  • Crazy about Buick!
  • *****
  • Posts: 392
Re: Windshield channel replacement pics
« Reply #3 on: April 02, 2009, 11:10:07 PM »
Nice work there buddy. looking real good. ;D
Going Fast with Class
GSCA # 3741
1965 GS 4 Speed Hard Top (Under Construction)
1965 Skylark 462, 12.21@109.8
1964 Special FireBall V6, 3 on the tree 4 Sale
1987 Grand National
1987 SS Monte T-Tops 4 sale
1995 Slammed Asstro
17 in Boyd Coddington
Daily Driver

Offline Chris

  • Crazy about Buick!
  • *****
  • Posts: 934
  • "Fast With Class"
Re: Windshield channel replacement pics
« Reply #4 on: April 03, 2009, 12:32:10 AM »
Thanks again Walt for taking all the time to document the process, this is exactly what I wanted this site to provide others and you are leader in this area.

Chris
-= A Howitzer with Windshield Wipers =-

 1965 GS Coupe
 1983 Porsche 911 SC
 2000 Porsche 911
 2011 Lamborghini LP550-2

Offline kcombs

  • Crazy about Buick!
  • *****
  • Posts: 415
Re: Windshield channel replacement pics
« Reply #5 on: December 15, 2009, 12:31:56 AM »
Nice article and great pics of the whole windshield channel replacement process. In fact after reading it  :dontknow:I got excited and went out to look at the windshield channel in my 65 El Camino which has the windshield out of it and two Skylarks with the windshield still in. The 65 El Camino looks like the dashboard and the channel is one continuous piece. Can anyone tell me what I am going to find under the windshield on a 65 Skylark? I was really hoping to just drill out spot welds and not have to cut and fit a butt weld the width of the dash. javascript:replaceText('%20:dontknow:',%20document.forms.postmodify.message);
Kurt
65 Bucamino
65 two door post (parts?)
65 Special wagon

Offline WkillGS

  • Administrator
  • Crazy about Buick!
  • *****
  • Posts: 1996
Re: Windshield channel replacement pics
« Reply #6 on: December 15, 2009, 10:53:43 AM »
The repair piece is listed in the catalog as fitting 64-67. I would expect your cars to have the same construction.
Walt K
Eastern Pa

66 GS Astro Blue/blue 425 auto
66 GS Silver Mist/black 401 4 spd
66 GS Flame Red/black 401 5 spd
66 GS Saddle Mist/black 401 L76 auto
66 Special Flame Red/black 300 5 spd
65 GS vert Verde Green/ Saddle buckets 401 4 spd
79 Turbo Regal